How to Fill Drywall Holes So They Can Be Used Again

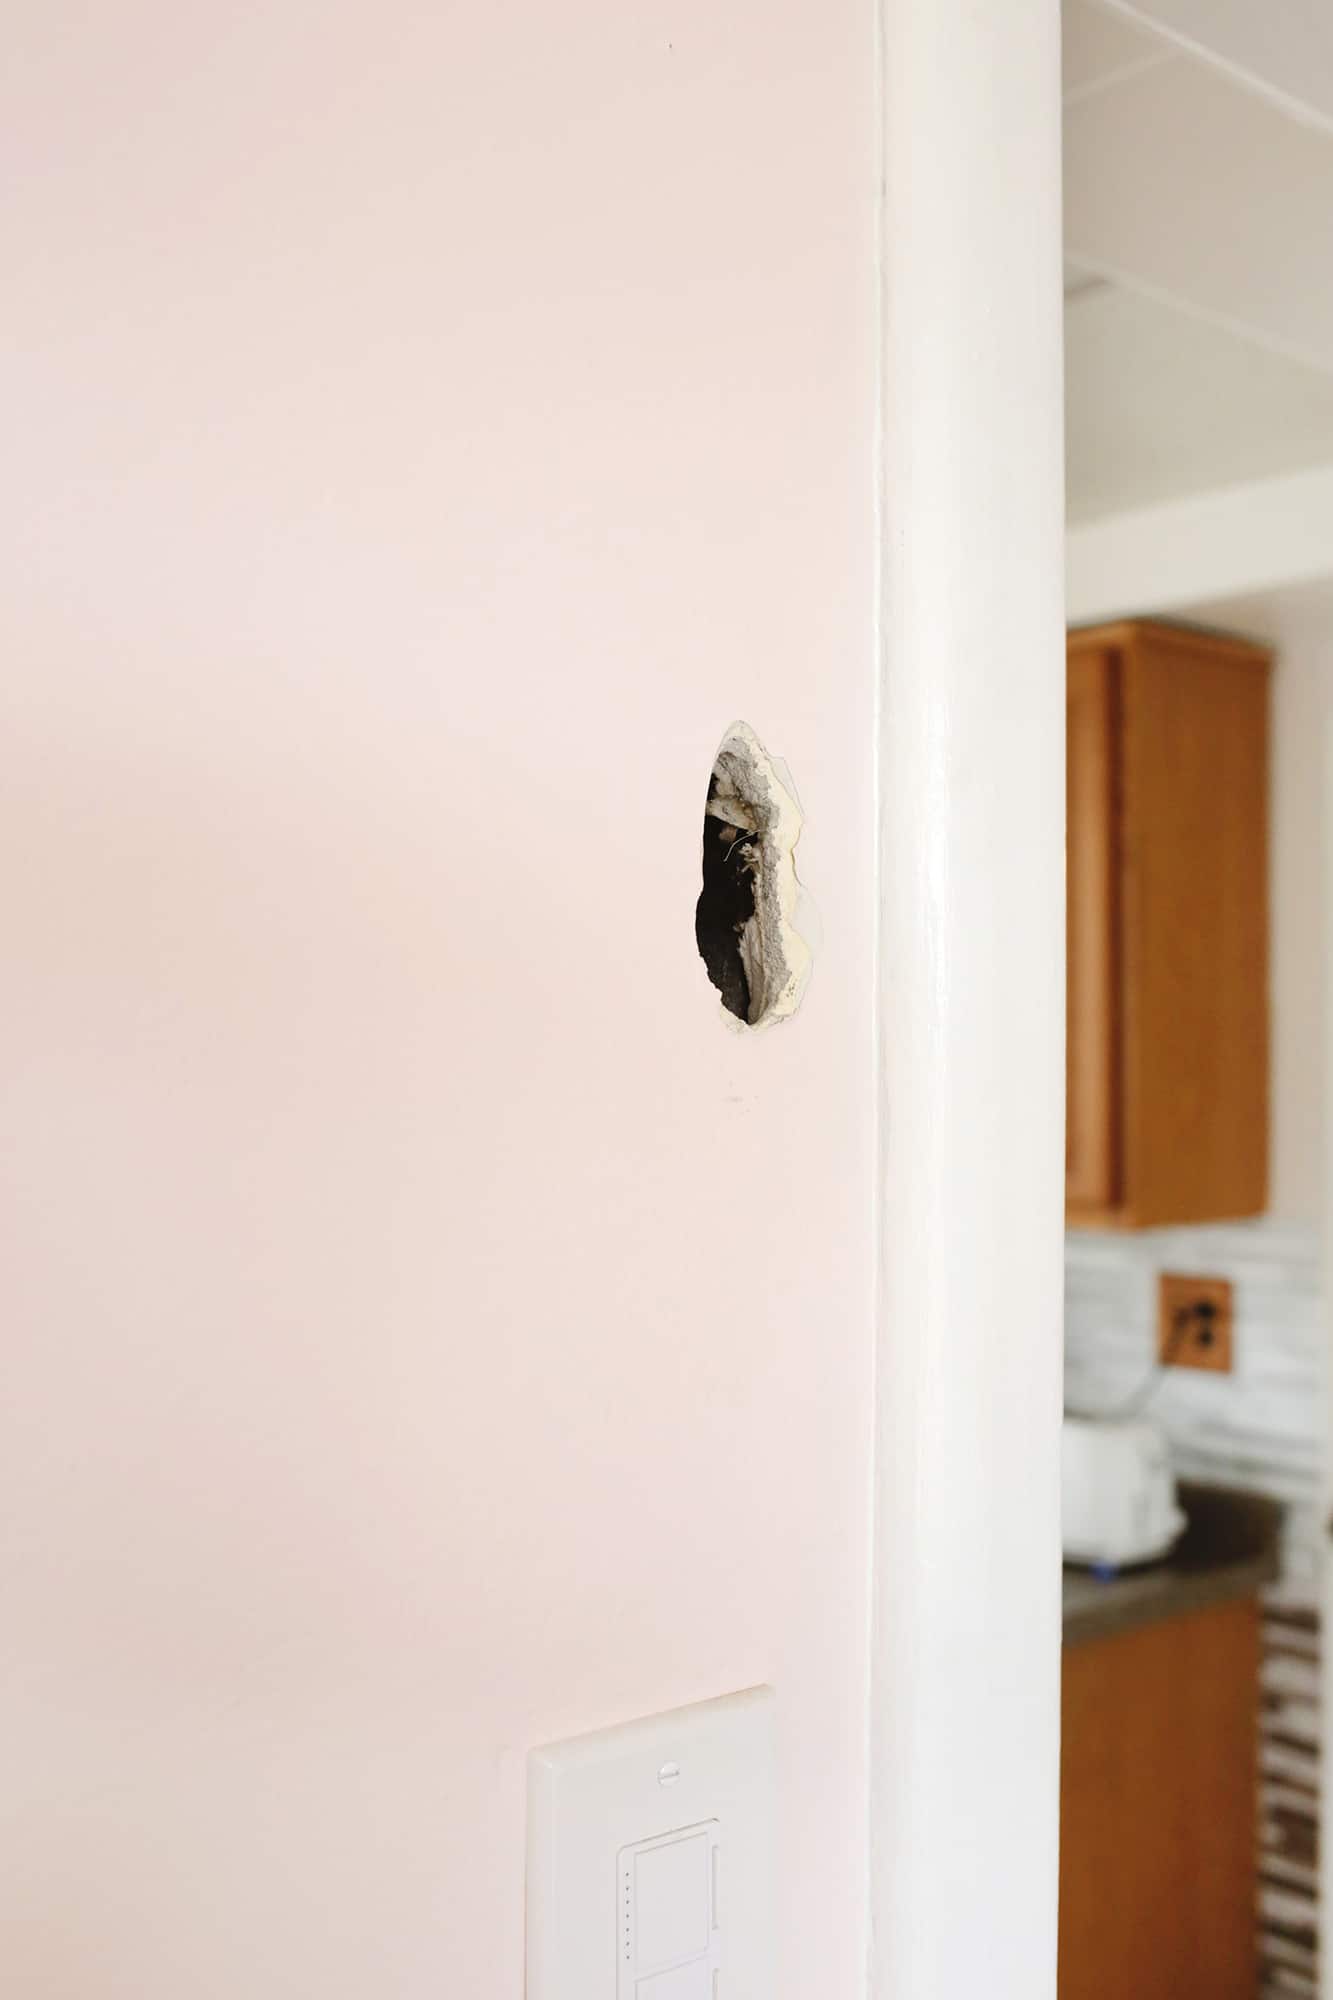
Whether you rent or own a house or flat, I think we've all had an occasion where at that place's been a hole in a wall that'southward needed to be patched due to some adventitious puncture, decorating change, or renovation consequence.
I know I've definitely patched a few in my time and I usually apply these patch kits (they come up in different sizes) to patch over the hole.
We are currently working on renovating our new mid-century home and nosotros have a few drywall projects to do around the house, and my mom reminded me of a story from when I was little where a carpenter neighbour helped patch a hole in our childhood sleeping accommodation.
She said she thought information technology was so cool because instead of using a mesh patch or edifice up the wall behind the hole, he but cut out a modest piece of new drywall (a few inches bigger than the hole), traced the shape of the hole onto the back of the drywall lightly with a utility knife, and then snapped off the backlog drywall chunks.
He left the front drywall newspaper layer intact so he could insert it into the wall like a puzzle piece. I had never heard of this hack, but information technology turns out information technology is a real trick that can be used to repair a custom hole with simply a chip of actress drywall. And then I tried it this week and it totally works! Hither's what I did:
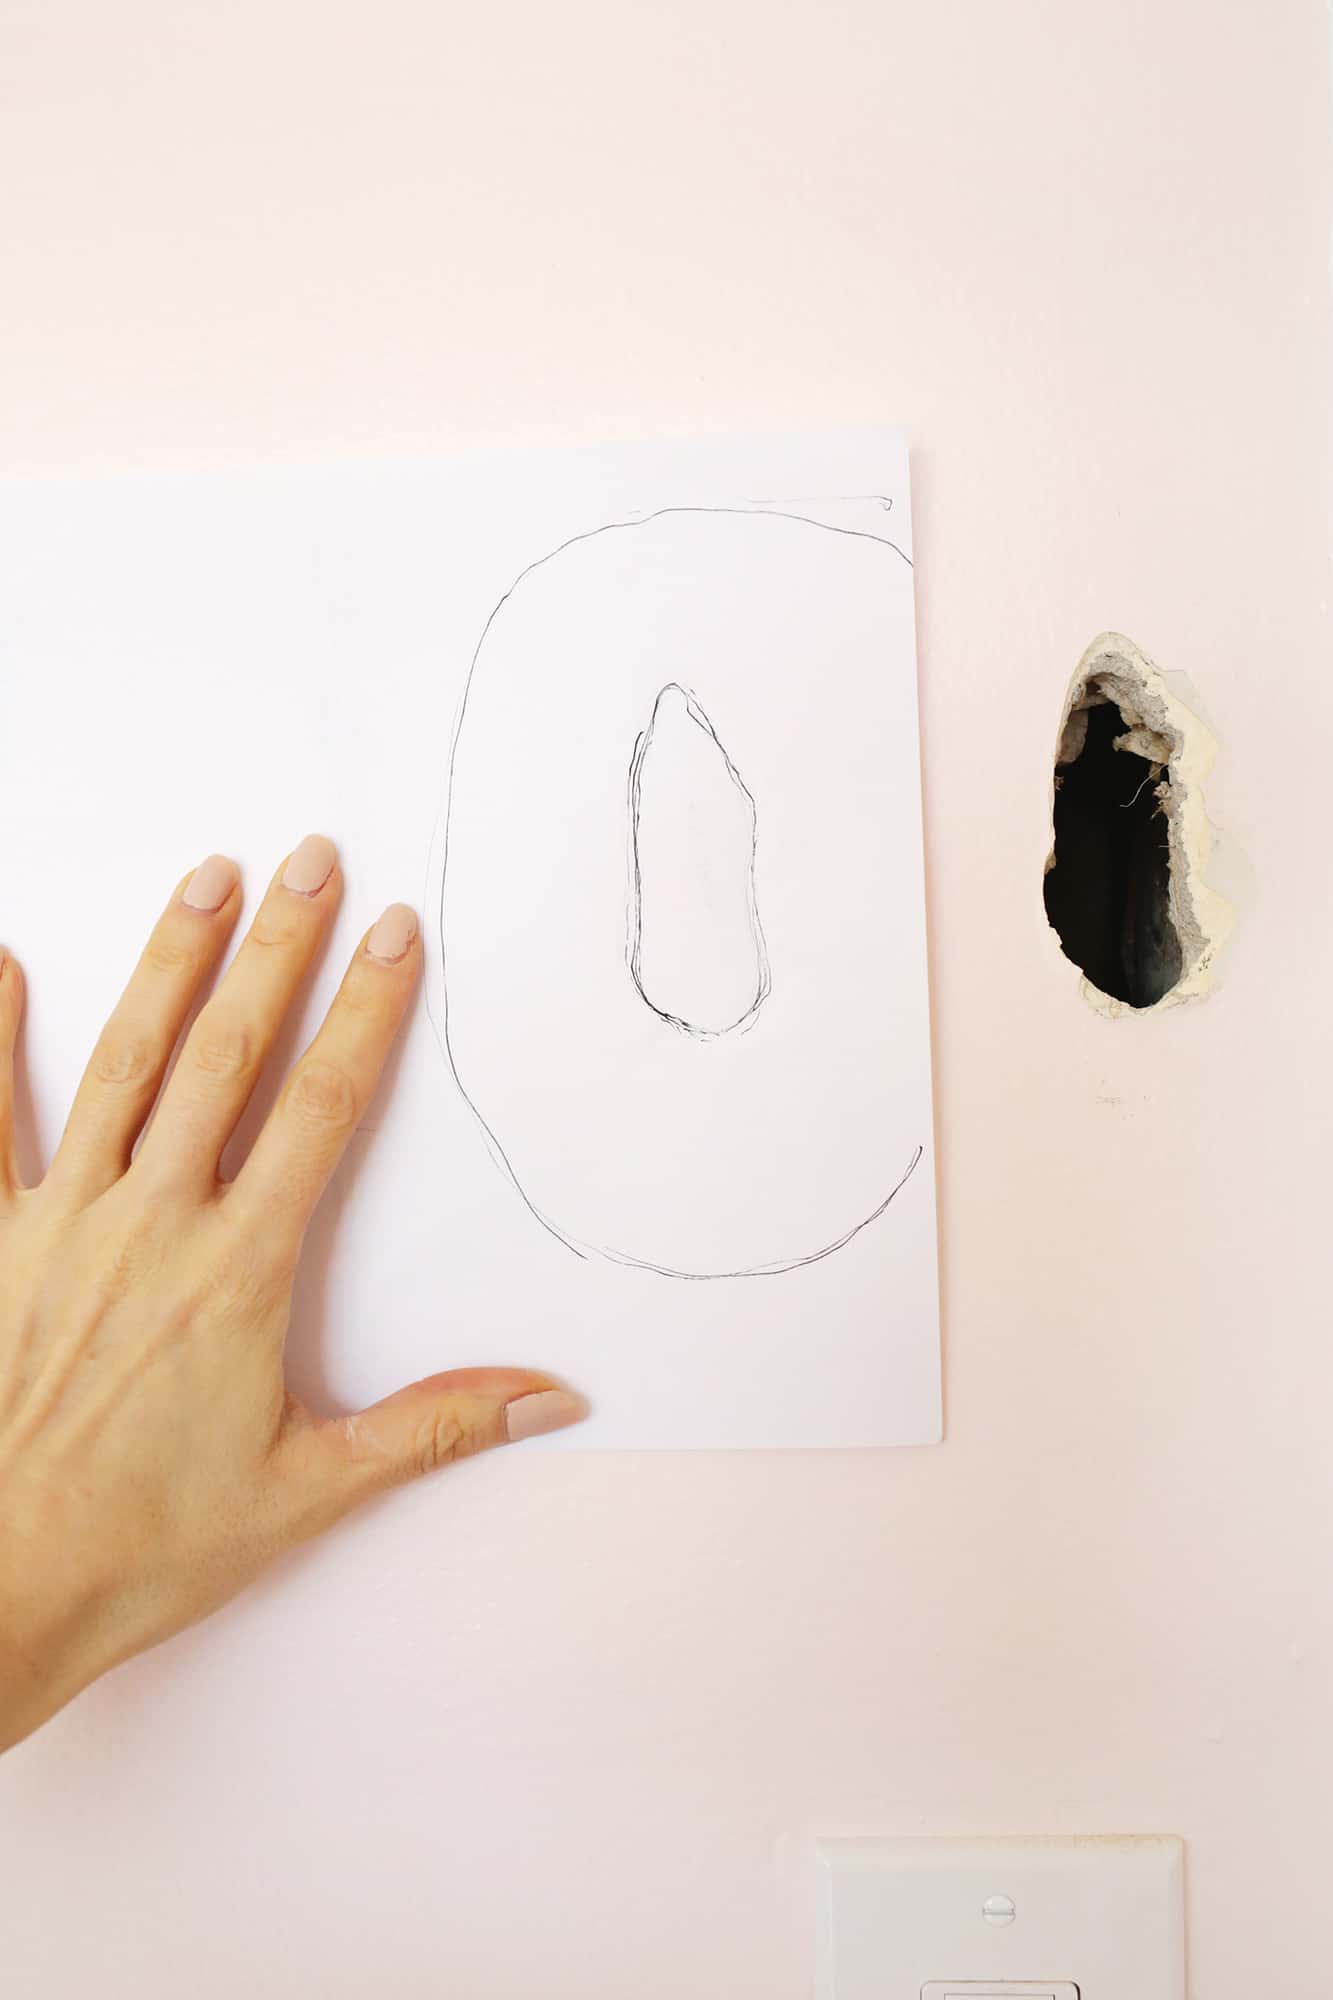 Trace your pigsty: Put a piece of paper over your hole and trace information technology either with a pen (if you tin see the lines underneath) or brand an indent in the paper with your fingers around the pigsty edge (if you can't run across the lines) so you can trace the indent with a pen once you take it off.
If you have a really crazy shape of a hole, you can knock out some actress drywall past lightly tapping at the edges with a hammer or screwdriver to brand a more uniform circle or oval hole.
Looking to do other drywall projects? Check out these DIYs…
- How To Fill In A Recessed Wall Niche
- How To Fill In A Pass Through Or Interior Window
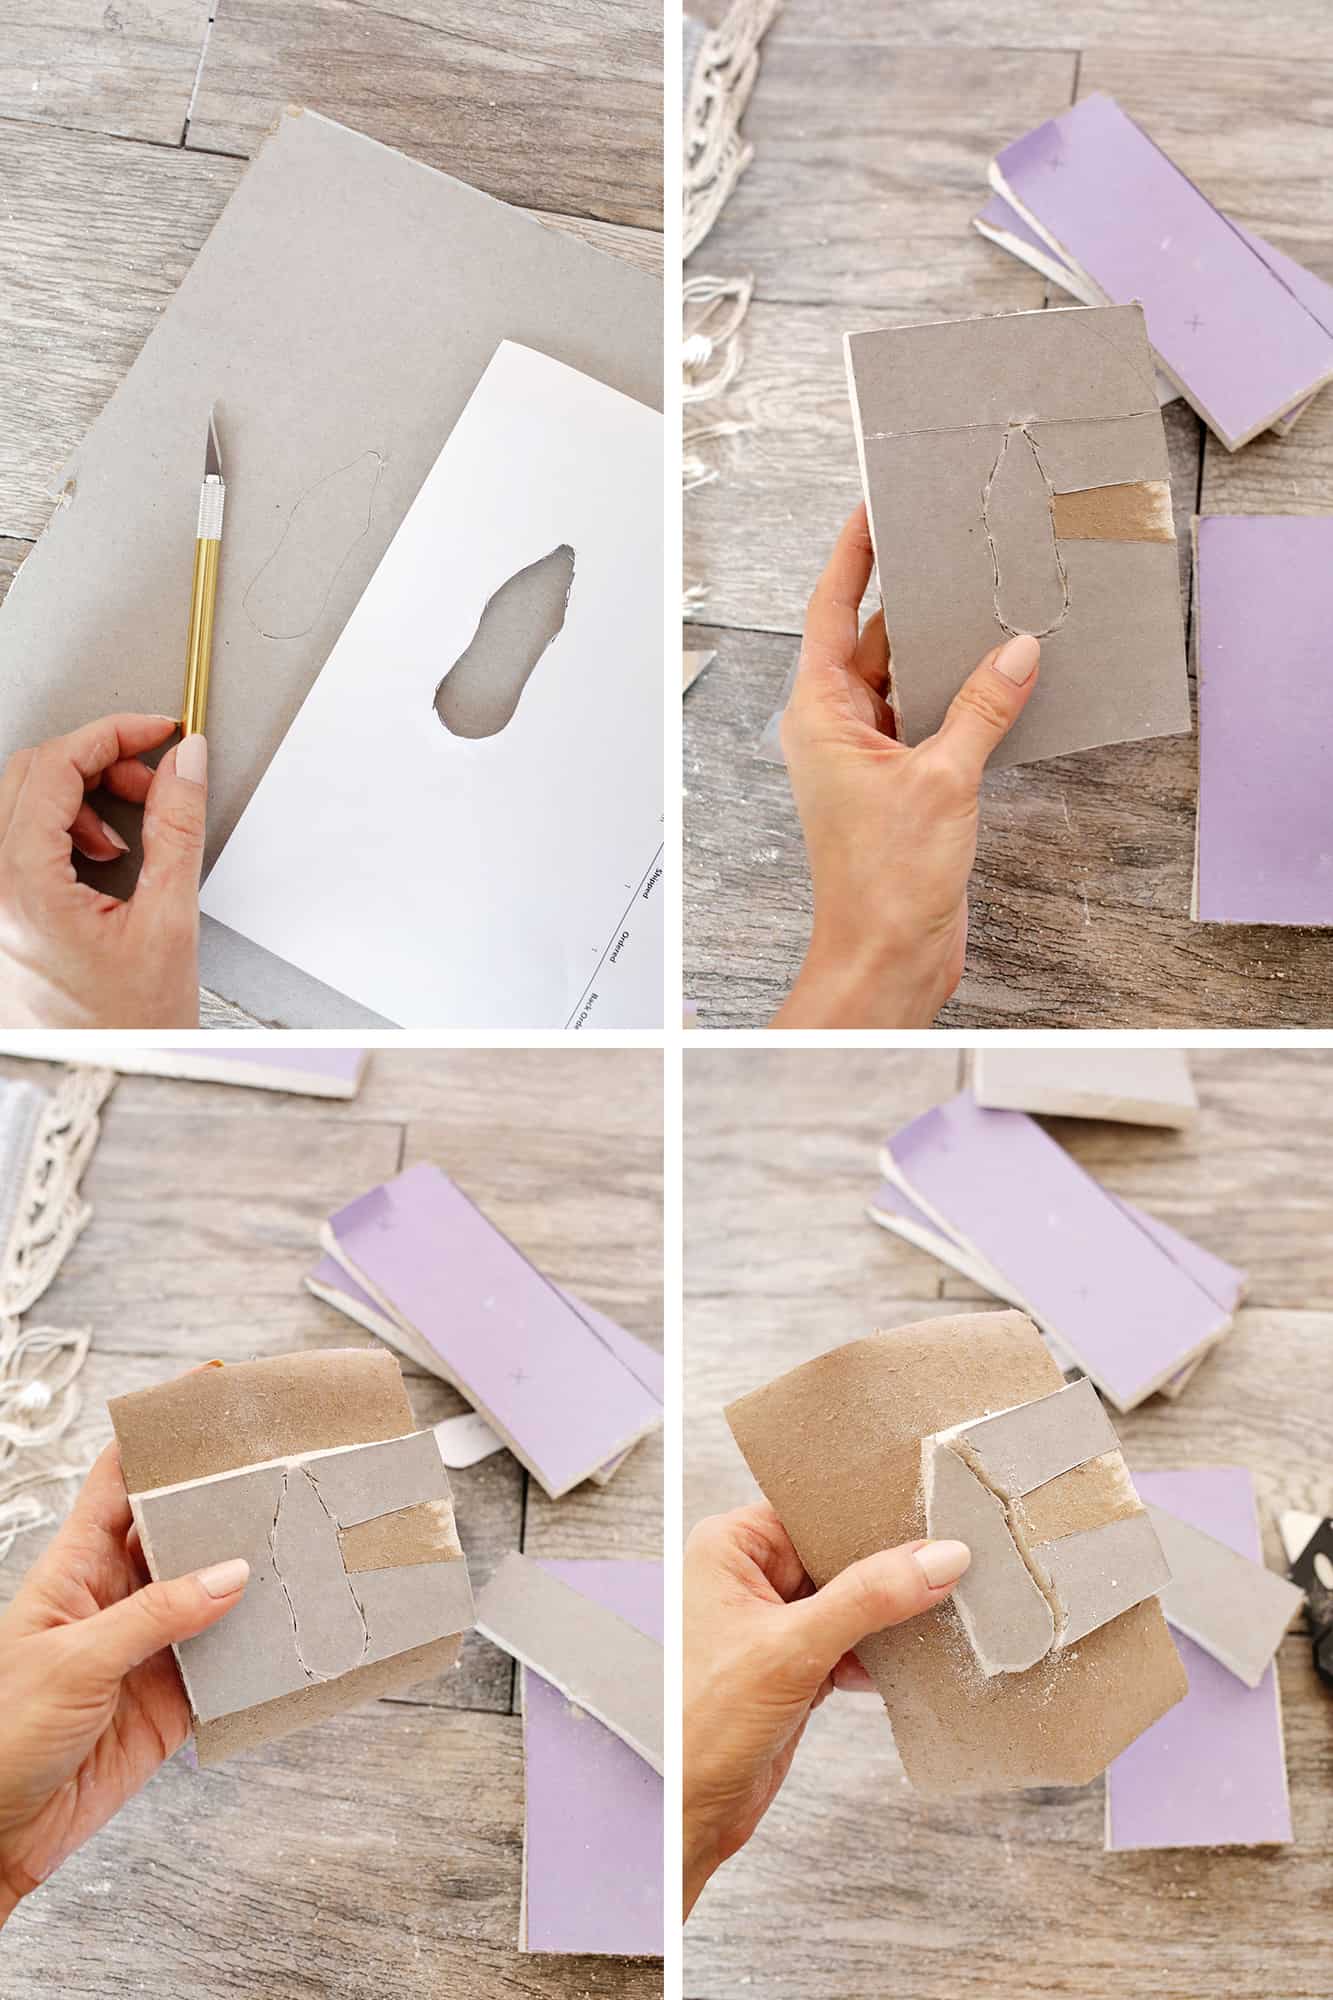
 Cut your drywall scrap: Use your utility knife (that kind where the blade folds in feels extra prophylactic to store effectually little kids) to cut and snap a slice of drywall that's a few inches bigger than your pigsty.
Center your tracking on the back of the drywall scrap and trace your hole shape onto the back of your drywall with your knife or X-Acto pocketknife.
Make certain your tracing is reversed so information technology will be the correct shape when you get to put it into your pigsty! You lot don't have to go super deep on your get-go pass, but trace it a second time when y'all remove the tracing paper to get a bit deeper.
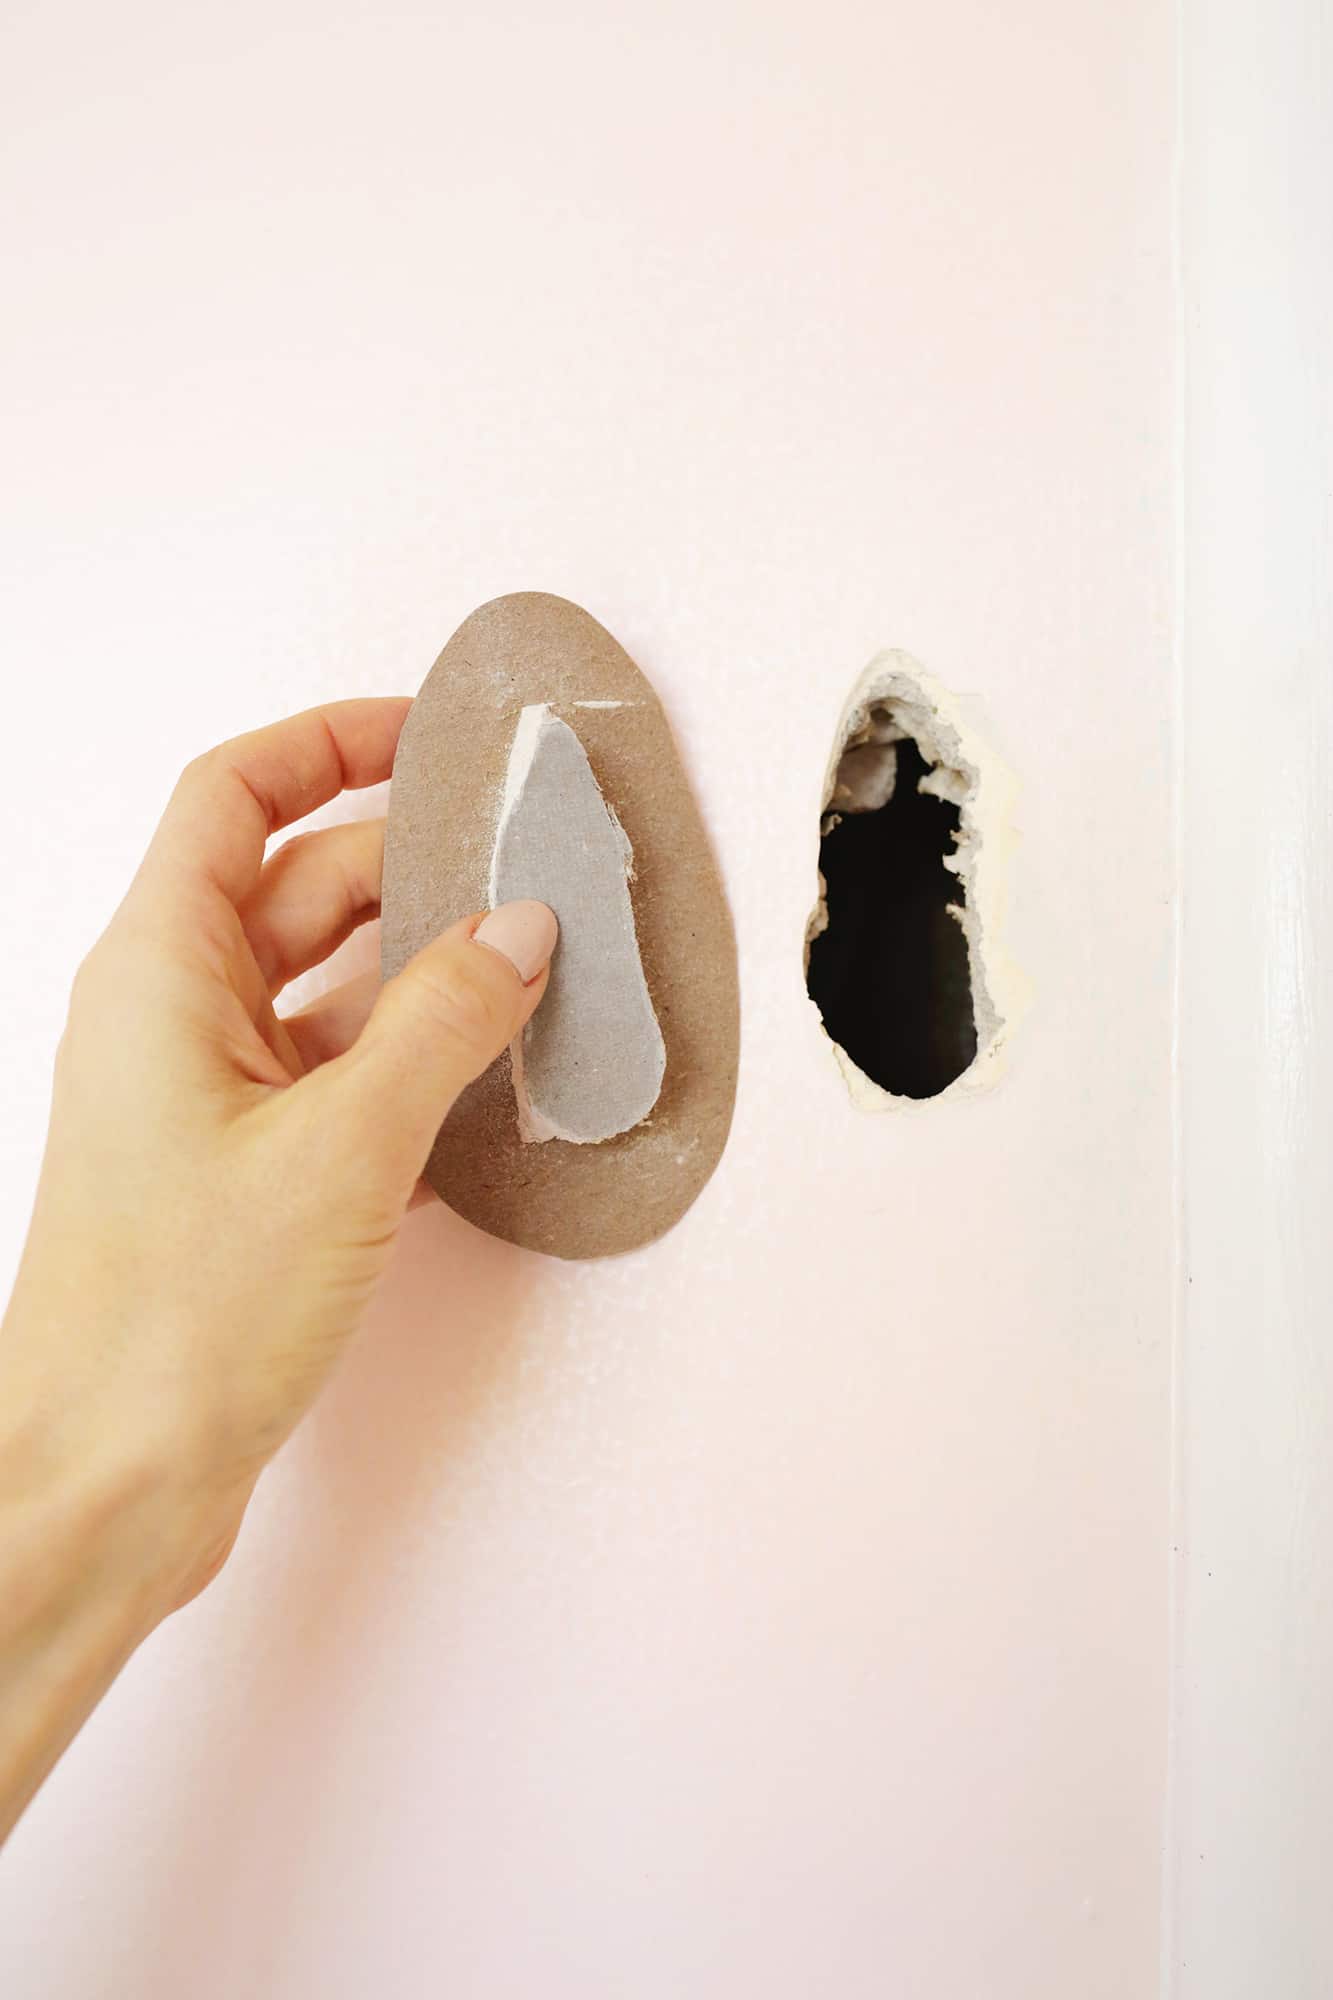
Snap off the extra (but keep the paper on): Now that yous have a shape traced, score a directly line across the tiptop and bottom of your shape and snap off those extra sections. Rather than cut those sections off, simply skin the drywall off the paper so the front paper stays fastened to the drywall patch.
Depending on your shape, you may need to go on scoring and snapping bigger chunks off or yous may be able to snap right at your traced line and peel off from there.
I only had to score beyond the peak and bottom and so the sides peeled off on their own. You can also trim down your excess newspaper with scissors if you lot take too much on the outside (I would do nearly ane.v″ around the border).
You can make sure your piece fits in the wall, and if it won't, you can chunk off a petty more than of your patch with your pocketknife until it fits hands.
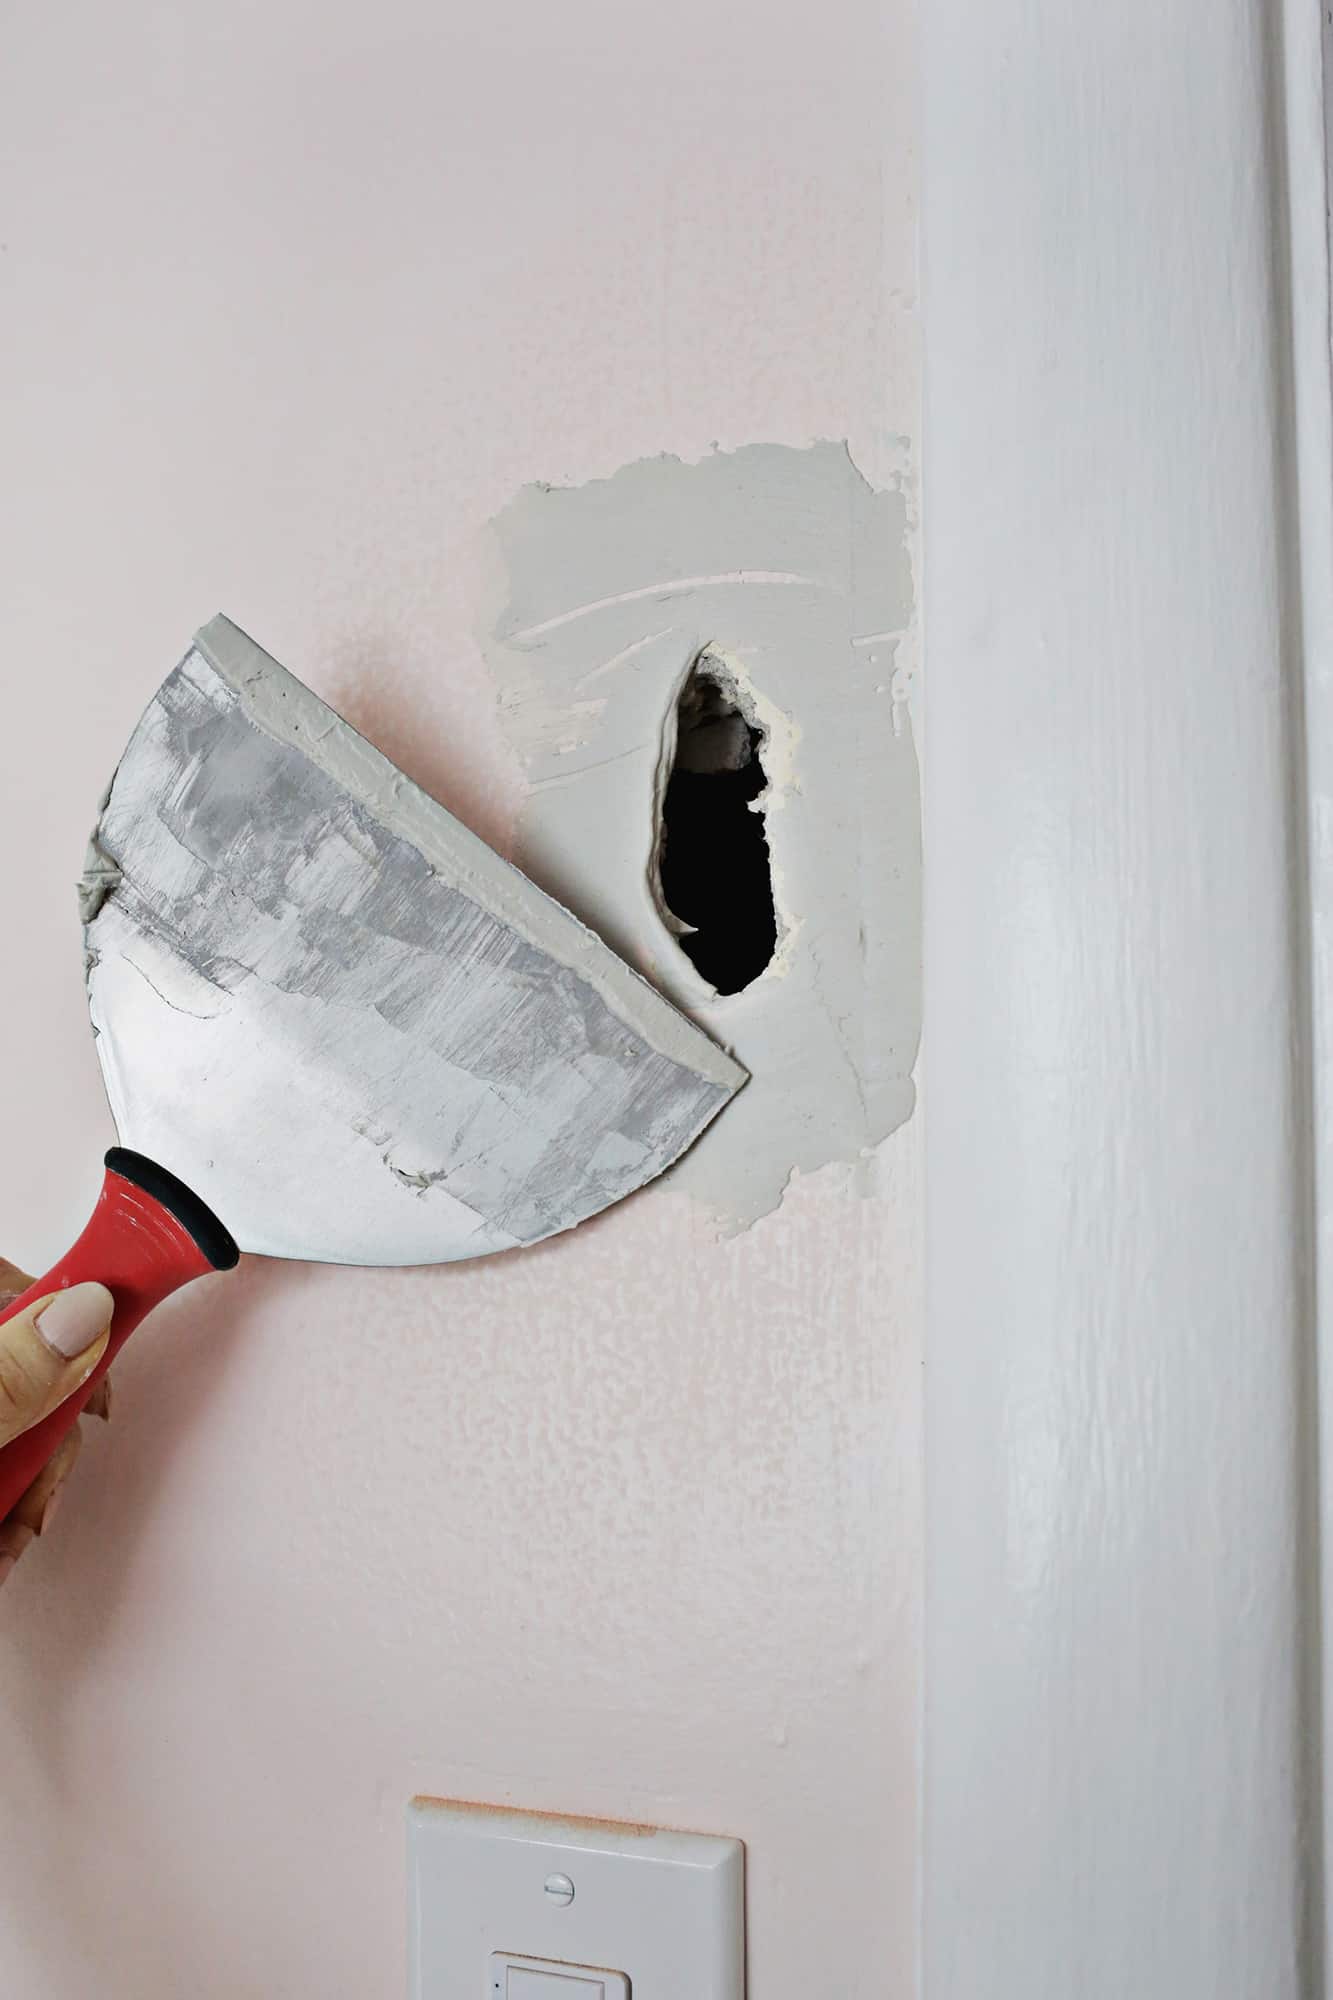 Attach your patch with mud: Now that you have your puzzle piece ready to go, sand the paint around the pigsty with some rough sandpaper to remove the gloss from your paint (the mud will stick better to a slightly crude surface).
Add together a thin layer of drywall mud (that bag of dry mix is slap-up because you lot tin merely mix up a little at a fourth dimension every bit needed) around the edge of the hole to human activity as a glue to concord your patch to the wall.
Slightly wet the paper edges of your patch and stick your patch into the wall. Use a joint pocketknife (I similar this 6″ one) to smooth over your patch and then yous come across the backlog mud squeezing out the sides to ensure a skillful seal. You tin too utilise regular spackle rather than the drywall mud if you adopt to utilise that production.
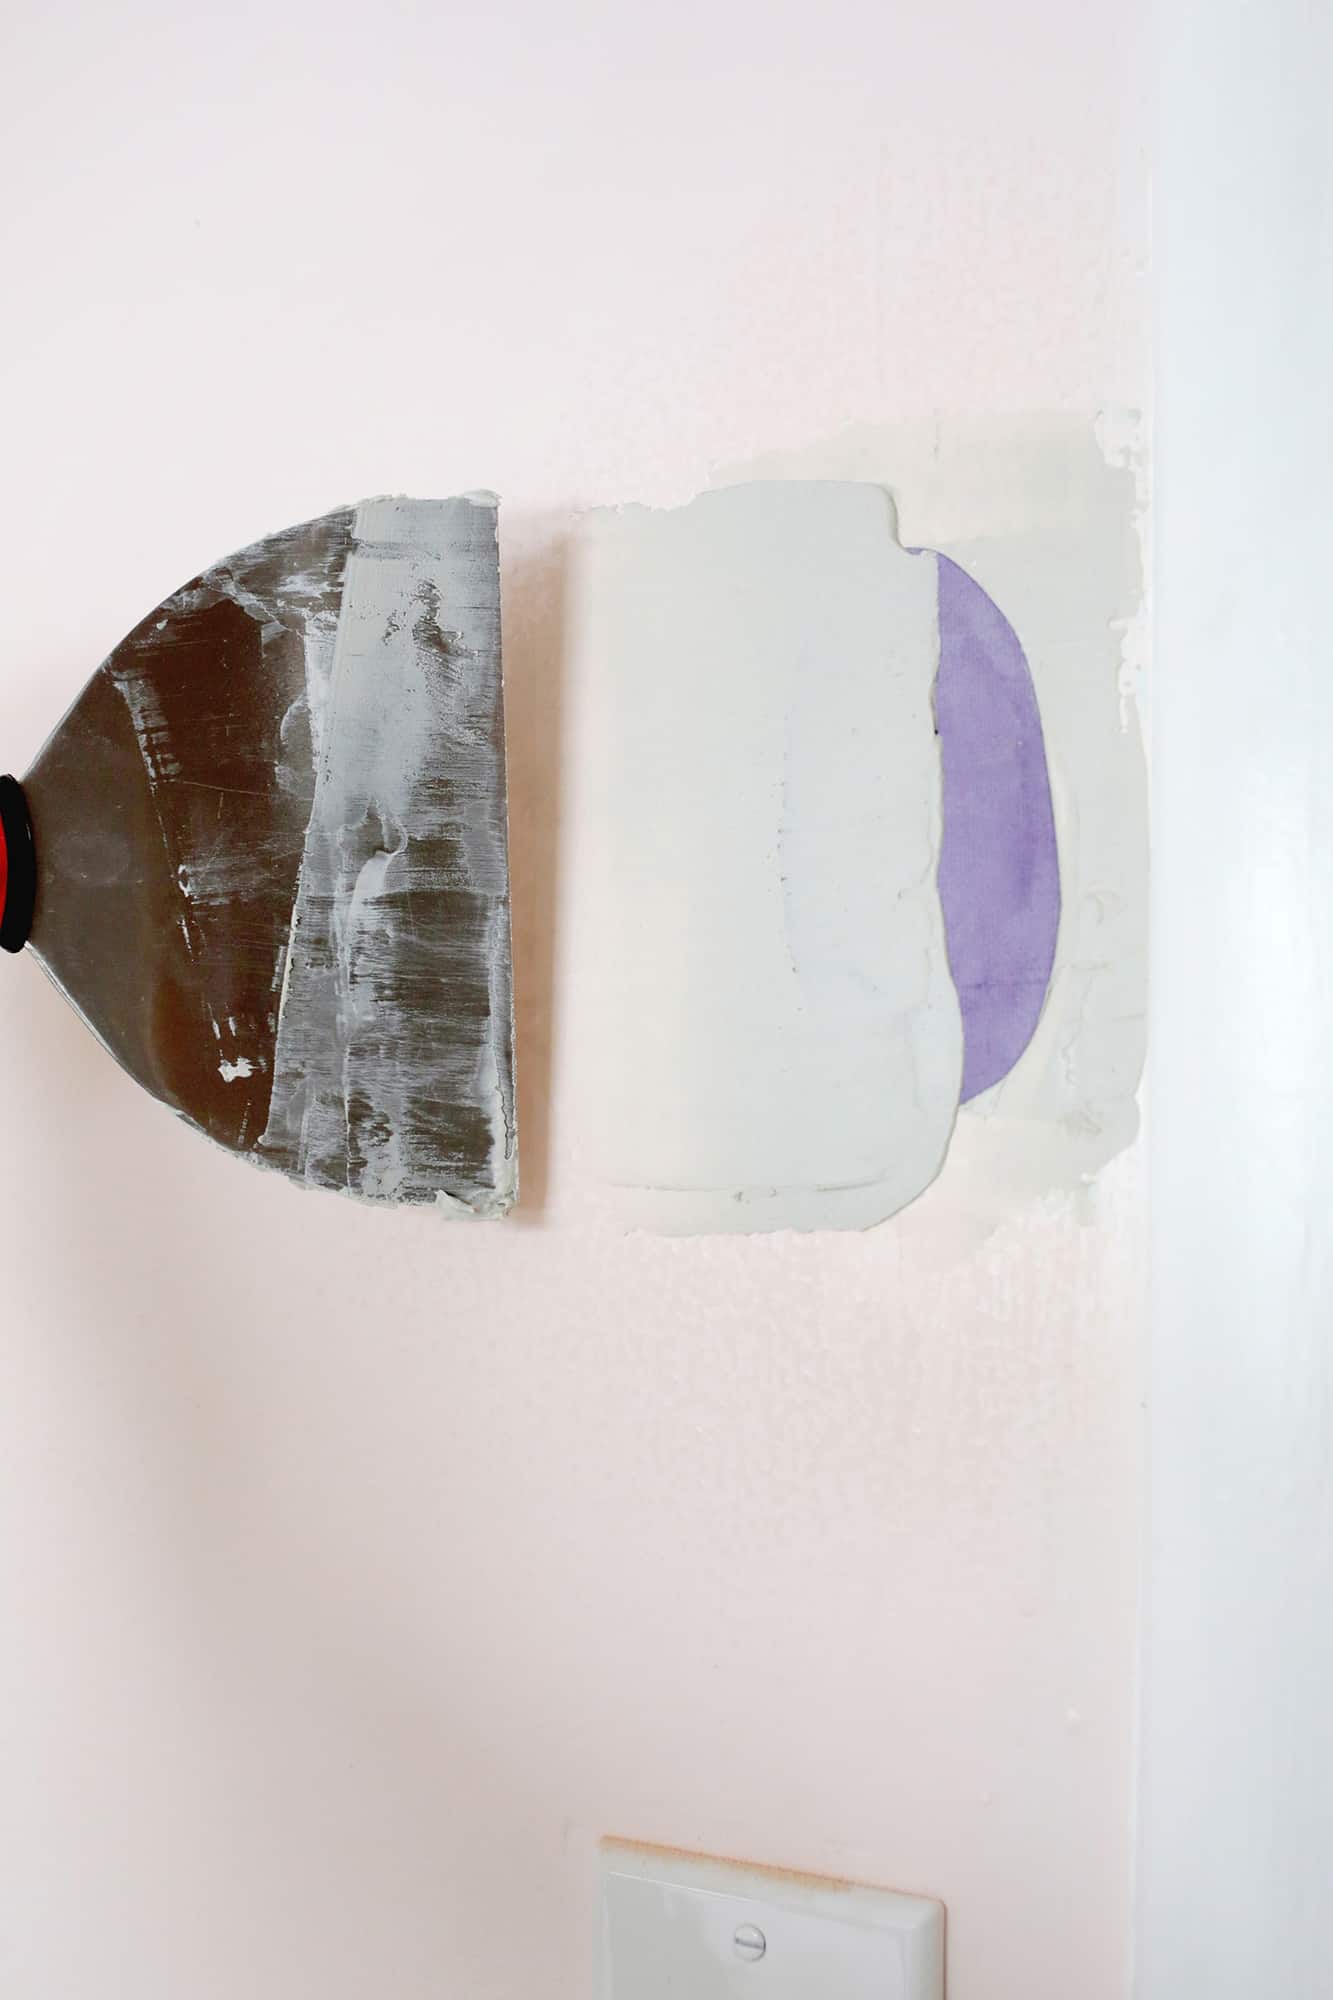

 Smooth over your patch/sand/paint: In one case you've smoothed out the nether layer of mud, go over the top of the patch with some other thin layer and endeavor to plumage out the edges so you'll take less sanding to practise later.
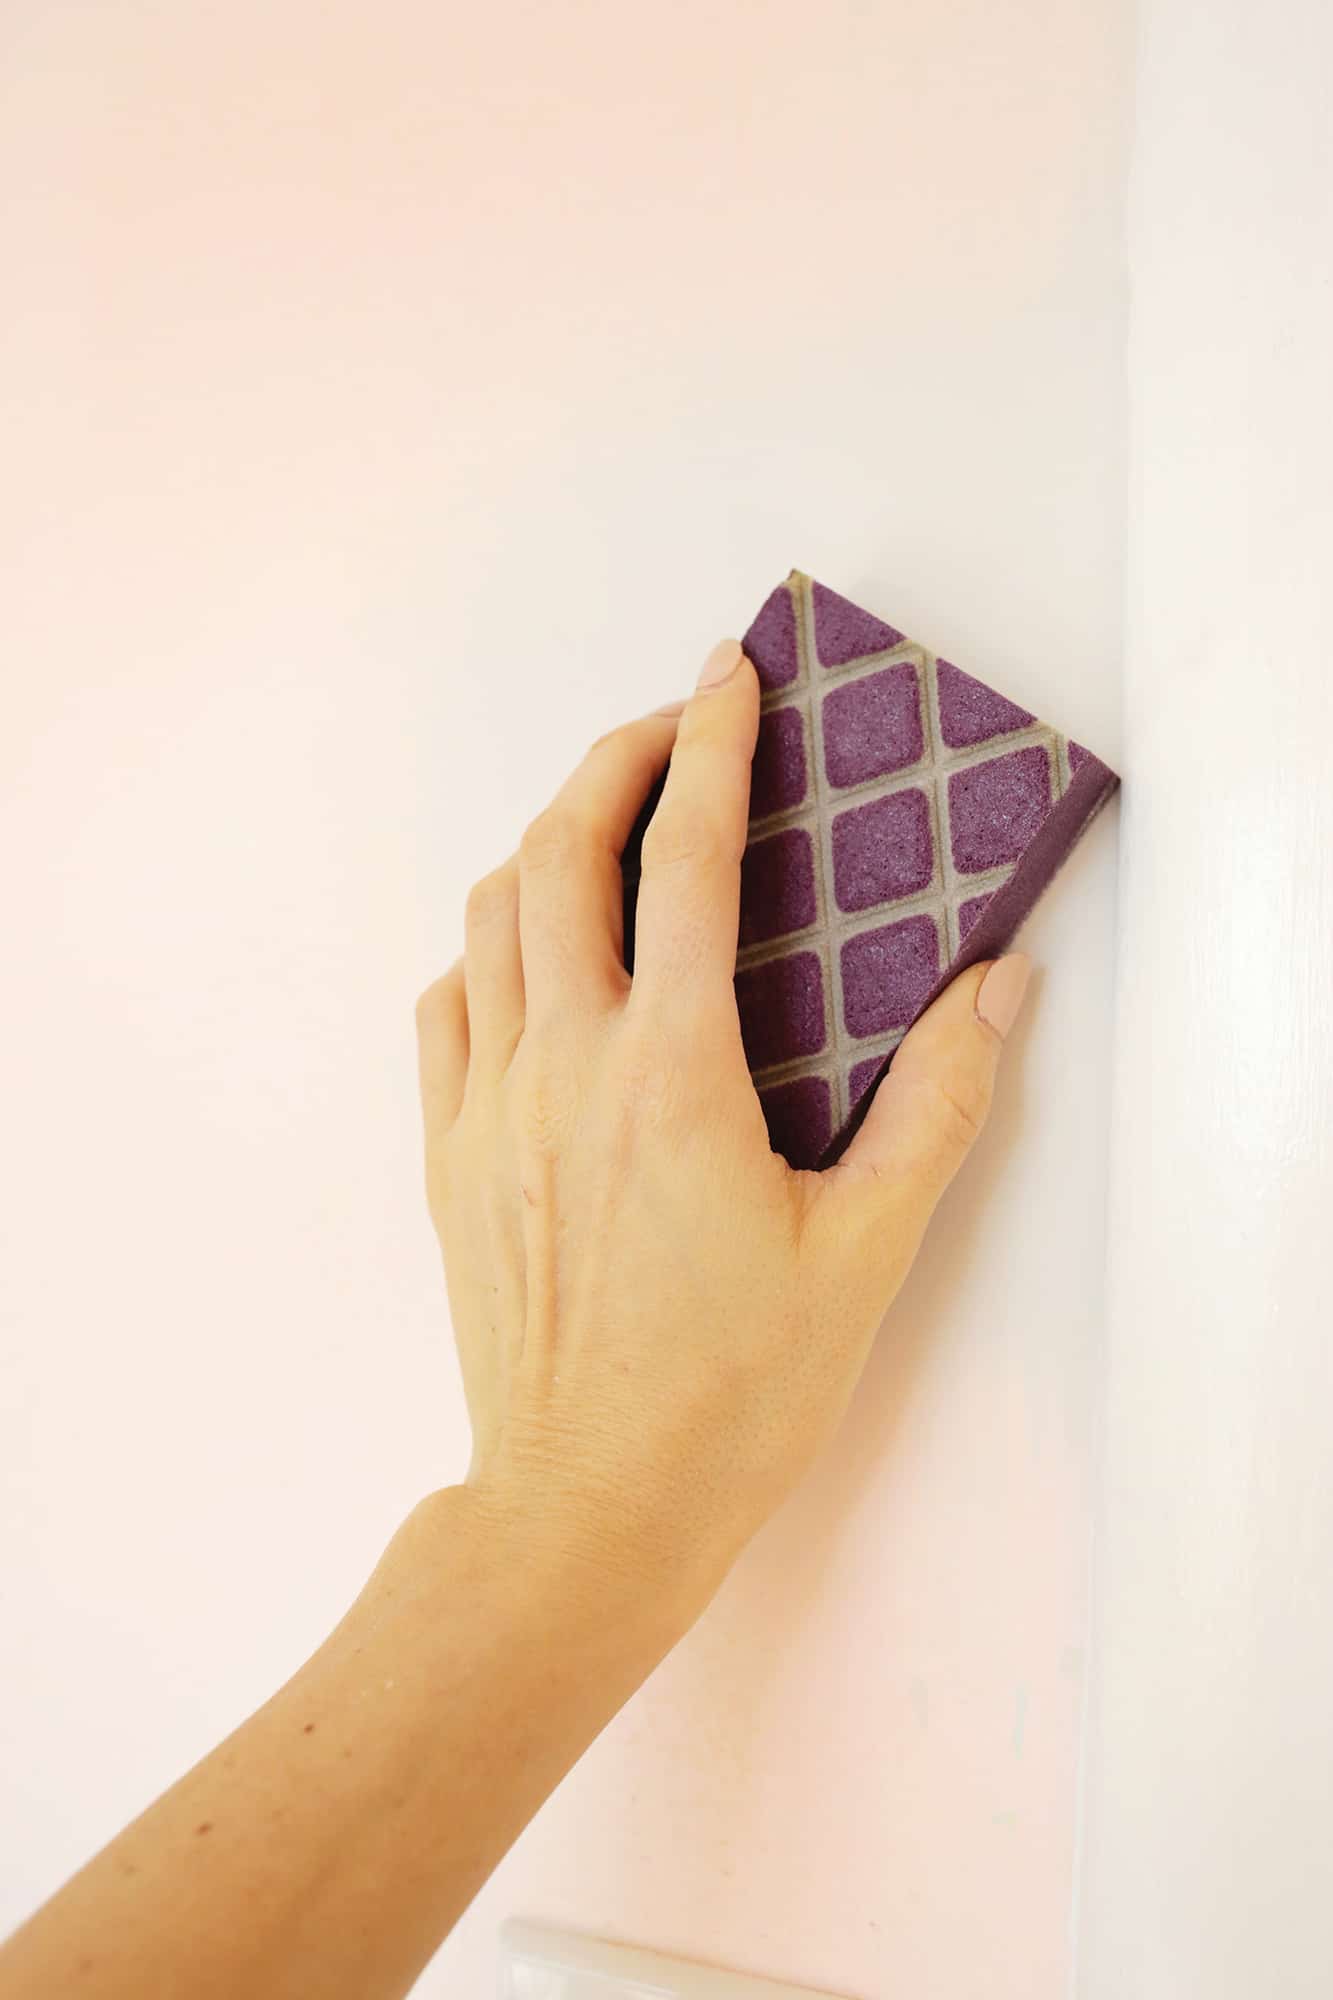
Permit that mud fully dry out and go over the patch again afterward with some other thin layer, going out even wider than the outset layer and feathering out the edges over again so you don't have hard edges to sand. Once it'due south all dry, give it a sanding with some sandpaper (medium commencement then a fine dust) and you're ready to paint over your patch!
Handheld sanders like this are helpful for sanding or these sanding sponges are smashing likewise! You'll desire to make sure to habiliment middle protection and an N95 mask when sanding drywall or patching compound to keep from animate in any of the dust during sanding and cleanup.
 The hole is gone!! And in example yous are wondering, this does work on plaster walls as well! My wall is really plaster (information technology's an older dwelling house so most of the walls are) and it worked just fine.
I would propose painting over your repair with a higher nap roller (or wait for ones that say they are for semi-crude surfaces) as that gives the super smooth new patch a little texture so information technology will match the residuum of the wall better.
This technique is meant for smaller holes in drywall, so if you accept more than of a medium-large size hole, y'all'll want to screw in wooden boards to the back side of your drywall hole to act as a brace and cut and adhere a drywall section to those boards–kind of like yous would when framing out a wall.
I filled in a large niche surface area with drywall doing that kind of method if you are interested in doing that…Promise this gives you a new handy tool in your toolbox for next time you have a hole in your drywall! xo. Laura
Curious how this room makeover turned out? Cheque out my Living Room Bout (Earlier + After!)
P.S. Bank check out wall and home decor on our wishlist and shopping pages to decorate your hole-gratis walls!
How to patch a drywall hole
Easy hack to patch a drywall hole
- chip of drywall
- utility pocketknife
- drywall mud or spackle
- half dozen" drywall knife
- fine sandpaper
- wall paint
- dust mask and heart goggles
-
Trace your hole: Put a slice of newspaper over your hole and trace it either with a pen (if you can meet the lines underneath) or make an indent in the newspaper with your fingers around the hole edge (if yous tin can't encounter the lines) so y'all tin trace the indent with a pen one time you take information technology off. If you take a really crazy shape of a hole, you can knock out some extra drywall past lightly tapping at the edges with a hammer or screwdriver to brand a more uniform circle or oval hole.
-
Cut your drywall flake: Employ your utility knife (that kind where the bract folds in feels extra safety to shop around piddling kids) to cut and snap a slice of drywall that'due south a few inches bigger than your pigsty. Middle your tracking on the back of the drywall scrap and trace your hole shape onto the back of your drywall with your knife or Ten-Acto knife. Make sure your tracing is reversed and then it volition be the right shape when you go to put it into your hole! Yous don't accept to get super deep on your first pass, but trace it a second time when you remove the tracing paper to go a bit deeper.
-
Snap off the extra (but go on the paper on): Now that yous have a shape traced, score a directly line across the top and bottom of your shape and snap off those extra sections. Rather than cutting those sections off, simply skin the drywall off the paper so the front end paper stays attached to the drywall patch. Depending on your shape, yous may demand to go along scoring and snapping bigger chunks off or you may exist able to snap right at your traced line and peel off from there. I only had to score across the top and bottom and then the sides peeled off on their own. You lot can too trim down your backlog paper with scissors if you lot have too much on the outside (I would do about 1.5″ around the edge).
You can make sure your piece fits in the wall, and if it won't, you lot tin chunk off a piddling more of your patch with your knife until it fits easily.
-
Attach your patch with mud:Now that you have your puzzle slice prepare to get, sand the paint around the pigsty with some rough sandpaper to remove the gloss from your paint (the mud will stick better to a slightly rough surface) and add a sparse layer of drywall mud (that purse of dry mix is great because you tin just mix up a lilliputian at a time every bit needed) around the edge of the hole to act as a mucilage to hold your patch to the wall. Slightly wet the newspaper edges of your patch and stick your patch into the wall. Utilise a joint pocketknife (I similar this six″ i) to smooth over your patch so you lot see the excess mud squeezing out the sides to ensure a good seal.
-
Smooth over your patch/sand/paint:Once you've smoothed out the under layer of mud, go over the top of the patch with some other thin layer and try to feather out the edges so you'll have less sanding to do later. Let that mud fully dry and go over the patch over again later with another thin layer, going out fifty-fifty wider than the first layer and feathering out the edges over again so you lot don't have hard edges to sand. Once information technology's all dry out, give it a sanding with some sandpaper (medium first then a fine dust) and you're ready to paint over your patch! Handheld sanders similar this are helpful for sanding or these sanding sponges are neat too! You'll want to brand sure to clothing eye protection and an N95 mask when sanding drywall or patching chemical compound to proceed from breathing in any of the grit during sanding and cleanup.
Credits // Author and Photography: Laura Gummerman. Photos edited with A Colour Story Desktop.
Source: https://abeautifulmess.com/easy-hack-to-patch-a-drywall-hole/
0 Response to "How to Fill Drywall Holes So They Can Be Used Again"
Post a Comment